Showing posts with label how to make. Show all posts

Poodle Skirt Tutorial for 18 inch doll

Saturday, May 14, 2011

How to make a no-sew poodle skirt for your 18 inch doll.


I made dress-up poodle skirts for my daughter's 7th birthday party. I had to make a matching one for her American Girl doll. These are so simple, your daughter can help you make one.

Materials Needed:
For Skirt:
16 inch x 16 inch square piece of colored felt. (Popular 50's colors, pink, baby blue, purple, red or black)
1 package Iron-On Velcro
Measure tape
Fabric scissors and cutting mat

For Poodle:
Hot glue gun
6 inch x 6 inch square of white felt (could use black)
small pom pom for tail (matching color)
Sharpie marker (black to draw eyes and nose)
7 inches of sequin ribbon for leash and collar 
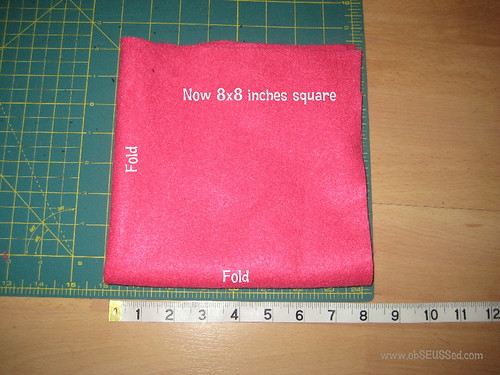
Start by folding the 16x16 square into an 8x8 square.

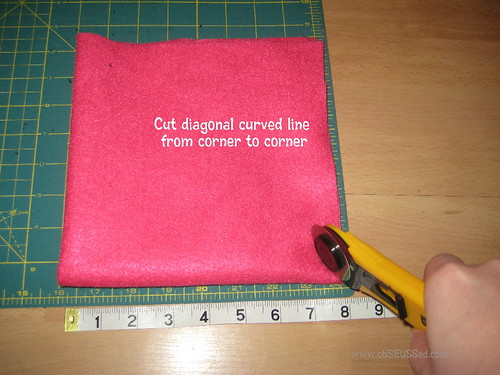
From open corner to open corner, cut a curved diagonal line across the middle of the fabric.

The curved edge becomes the bottom edge of the skirt.

Now mark 3 inches from the folded corner on both folded sides. Cut a curved diagonal line from each mark.

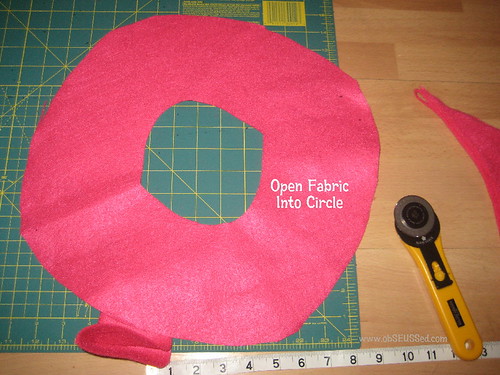
Now you should have a circle with a hole in the center for the waist.

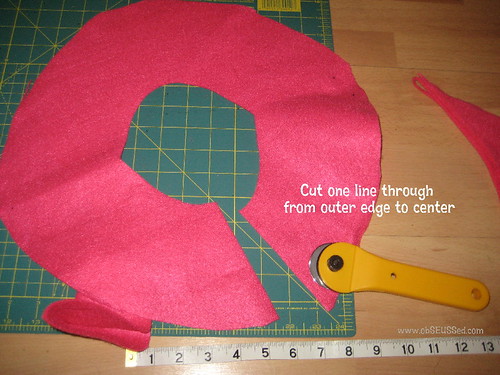
Pick any area and cut a line from the outer edge all the way to the center circle.

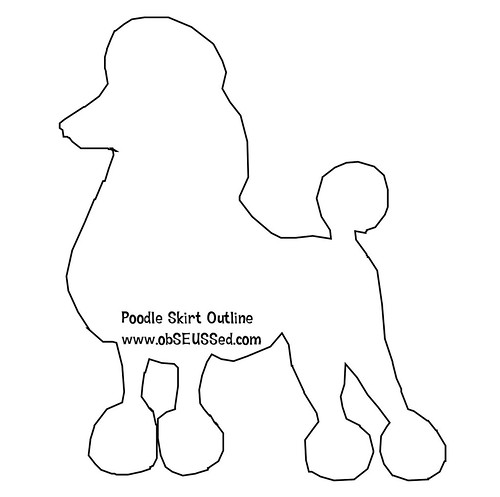
FREE PRINTABLE: Poodle Outline
Copy and paste this image into 'Microsoft Word' or another program. You can adjust the size. You'll want it about 3 inches tall.
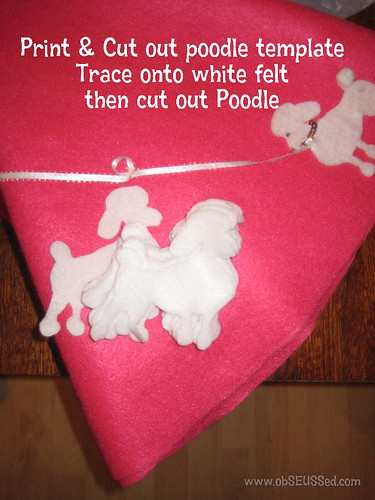
Print the template and cut out the poodle on your paper.
Place on white felt, trace around the edge.
Now cut out the felt poodle.

Hot glue the sequin ribbon behind the neck to hold it in place.
Hot glue the poodle onto the skirt (lay it out first and wrap around the doll to see where you want it to lay).
Then glue the pom pom on the tail. 
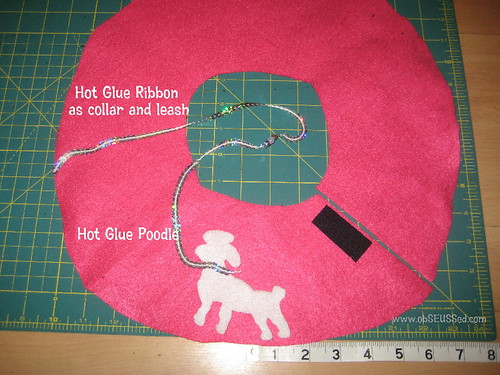
Next, glue the ribbon across the poodle's neck then glue it up to the waist of the skirt and tuck onto back side of skirt.

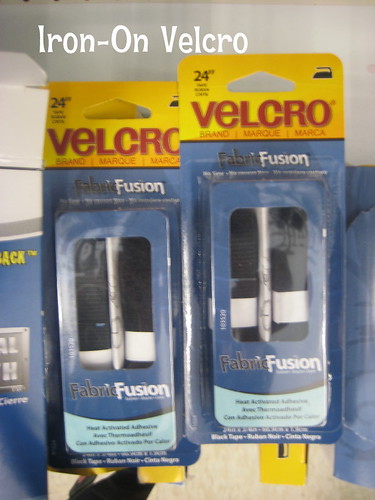
Open velcro, cut 2 pieces of the loop/pokey style (not the soft matching velcro), 2 inches long.

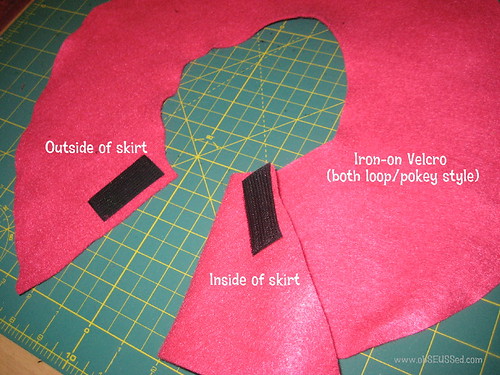
Next, layout your velcro, one on outside top corner edge of skirt, one on inside top corner edge. You want the pokey part of the velcro so it will stick to the skirt once you wrap it.  Now iron both pieces on as directed by the velcro package.


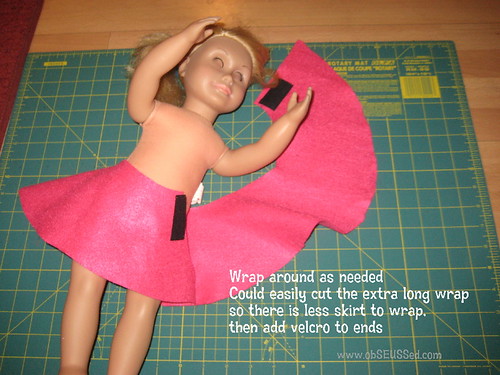
Wrap it around your doll and the velcro will stick to the skirt as needed.
You can cut the length of the circle shorter if you don't want as much excess wrap. If so, cut it first then add the velcro on the ends.

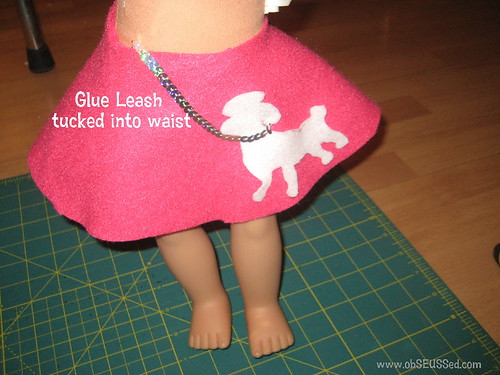
Make sure leash is tucked into waist.  Now find a cute shirt to match and tie some pink tool in her hair for a bow and your set for the Sock Hop!

Make matching poodle skirts. See tutorial for girl size skirt here.

Linking to more great projects at Tip Junkie.

Second Day of Christmas Books: Snowman Stories and Earrings

Tuesday, December 14, 2010

The Second Day of Christmas, ObSEUSSed gave to me:
Snowman Stories and
The Berenstain Bear Family

Our kids get so excited for the first day of snow. We've had a few good storms so far and made a few snowmen but it has all melted. We are hoping to "Let it Snow, let it snow, let it snow" so we can build more snowmen.

Snowmen All Year is written and illustrated by Caralyn and Mark Buehner, who reside in Salt Lake City, UT.  The snowman gets to experience swimming and the 4th of July Fireworks (pictured at Sugar House Park) and trick-or-treating. Such a fun book for younger children.
Here are a few of our other favorite Snowman Books (and the classic movie I remember watching in Grade School).


KID CRAFT:

Character Snowman: If your kids like a certain character, try to model your snowman after them.  We love the Cat in the Hat so our snowman always wears a striped stove pipe hat and striped scarf. 

WATER COLOR PAINT: Have your kids look at a picture of their favorite character and try to replicate it with water colors.
I painted the first picture with my children's water color set.  It is a large 12 by 20 inch picture we have framed that hangs in our reading room.

SNOWMAN EARRINGS:

My daughter likes to help me make these. We've made them for grandmas and her school teachers. We get out all the supplies then she assembles them and I add the hook.

Tools Needed:
Wire Cutters
Small Round Nose or needle nose Pliers

Supplies Needed: (Get extras so you can make more than 1 pair. Look around your bead shop for anything that might work for these. They don't have to look just like mine. Get creative.)
Findings
2- Fish Hook Ear Wires (I like Sterling Silver) can be found most places beads are sold, like at Joann's.

2 - Headpins 1.5 inches (look like a strait pin without the point)
Beads
3- Faux pearl beads, white. 2 larger (8 mm) 1 smaller (6 mm). They often sell assorted size sets.
2- Red Rondelle Spacer beads for the scarf, these would be pretty from Sunset Crystals.
2- Black Saucer (or Rondelle) beads (8mm) for the hat rim (here are some on Etsy) I used a rock chip.
2- Black Short Tube Beads for the top hat -sample at Artbeads (or a cube) something like this at Joann's.
Instructions:
1. Take the headpin and put the two larger pearl beads on, then the red rondelle (scarf), then the smaller pearl bead (head). Now put the black saucer bead on (hat rim) and the black tube bead (top hat).

2.  You only want about 1/2 inch of the headpin above the snowman so if there is more, use the wire cutters to trim it. Use the pliers to Bend the top of the headpin in a 90 degree angle.
4. This is the tricky part. Use the round pliers to pinch the head pin and use the needle nose pliers to wrap the tail of the headpin around the headpin towards the beads until it is all wrapped with no overhang.
5. Use the needle nose pliers to open the circle on the bottom of the fish hook earring finding.
6. Connect the headpin loop and the fish hook circle. Then use the pliers to close the fish hook loop. Here is a great video for a simple way to connect the dangle beaded headpin to the fish hook earring.

You can wear your snowman earrings all winter long, not just before Christmas. These make great teacher gifts.
Utah readers: Don't forget to enter my giveaway for a Thanksgiving Point family, annual membership ending this Fri.

Linking to:
Tatertots and Jello, Weekend Wrap-up Party
Tatertots and Jello, Homemade Gift Ideas Party
Today's Creative Blog, Get Your Craft on Tues.
Tip Junkie's Tip Me Tuesday
Funky Polkadot Giraffe, Too Cute Tuesday
Blue Cricket Design, Show and Tell Wednesdays
Sassy Sites, Free for All Friday
Fancy This Fridays on Truly Lovely
Sweet Jeanette's Very Merry Christmas Party Link-up
Skip to My Lou, Made by You Mondays

LinkWithin

Related Posts with Thumbnails